Fairy Inkcap Mushroom Watercolor Tutorial: Easy 3 Color Technique
If you consider yourself a reluctant artist, this one is for you. With only three watercolor paints and two brushes, you can paint a cluster of tiny fairy ink cap mushrooms tucked into soft forest moss.
Table of Contents
Watch the Tutorial

Why This Watercolor Mushroom Painting Is Perfect for Beginners
This is a longer tutorial than some of the others in this series, but it is not a difficult one. It is more of a practice in restraint, repetition, and patience… little bell shaped mushrooms, then layer after layer of soft green moss. It is the kind of painting you can sink into for a while, and it is a lovely one if you are drawn to old forests, folklore, and the quiet magic of things that grow slowly.
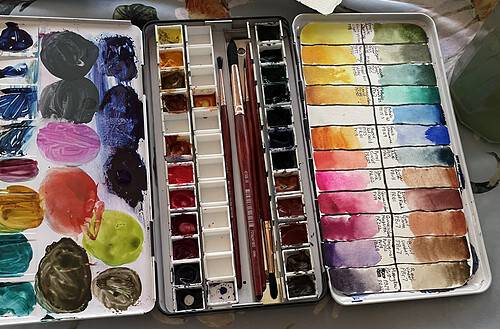
Watercolor Supplies You Will Need
Watercolor Paints (Three Colors Only)
- A warm yellow, such as New Gamboge
- A cool red, such as Quinacridone Rose
- A warm leaning blue, such as French Ultramarine
Any warm yellow, cool red, or warm blue you already own will work
Watercolor Brushes
- A round brush, size 3
- A round brush, size 10
Round brushes with a pointy tip make it easy to move between the small mushroom details and the larger moss washes. Brand does not matter, use whatever works best for you.
Watercolor Paper This tutorial uses a cold press, 100% cotton, 5×7 watercolor block, glued on all four edges to keep the paper from wrinkling as you paint. Whatever paper you choose, 100% cotton is highly recommended for the best results.
Supplies (Amazon Links) (Some links are affiliate links: see note below)
- Watercolor Paints: Daniel Smith Professional Watercolors https://amzn.to/4lASfPl
- Paper: Arches Natural White 100% Cotton Cold Pressed https://amzn.to/3Phgqq7
- Brushes: Princeton Aqua Elite https://amzn.to/4cZi4Xn
- Brushes: Princeton Neptune https://amzn.to/4bgEd23 or
- Watercolor Paints: MeiLiang Pretty Excellent Watercolors https://amzn.to/4btAr4a
- Paper: Paul Rubens Natural White 100% Cotton Cold Pressed https://amzn.to/4sWyF2O
- Brushes: Windsor & Newton Cotman Round https://amzn.to/4lFRIvS
- The links above are Amazon affiliate links, which means I may earn a small commission if you purchase through them (at no extra cost to you). Thank you for supporting my work and helping me continue to create free, encouraging art tutorials 🤍
Step by Step: How to Paint Fairy Ink Cap Mushrooms
Step 1: Mix a Blue Leaning Purple
Mix Quinacridone Rose and French Ultramarine, adding the blue in slowly since it can easily overpower the mixture. Take your time until you land on a purple you like, this is an art form, not a science. Once you have your purple, clean your brush and mix in a small amount of yellow to mute the brightness into a soft, grayish purple.
Purple was chosen here instead of white because it gives the mushrooms a soft shadowed look, and it will stand out beautifully against the green moss added later.
Step 2: Paint the Mushroom Caps
Using your purple mixture, paint small bell shapes clustered together across your paper. Fairy ink caps naturally grow in clusters, so do not be afraid to add quite a few. There is no need to plan them out in advance, simply place a cap wherever you feel there is a nice open space. If your water starts to pool, blot it gently with a paper towel and keep going.
Step 3: Add the Curving Stems
Using your number 3 round brush and the same purple, paint small stems beneath each cap. Fairy ink caps are often found growing vertically on the side of a tree or a patch of moss, so let the stems curve and hook slightly to the side rather than growing perfectly straight down.
Step 4: Add Simple Shadow Lines
Load your brush with the same purple and add a few loose lines running upward from the base of each mushroom. This step is more about suggestion than precision, think of it as a small exercise in restraint. Simple lines are enough to hint at form without overworking the shape.
Step 5: Mix and Paint the Green Moss
Mix New Gamboge with small amounts of French Ultramarine, adding the blue slowly until you reach a green you like. Once your mushrooms are dry, use this green to paint carefully around each one, filling in the surrounding space while leaving the light purple mushrooms untouched so they stand out clearly against the moss.
Layer the green gradually, building up light greens, mid greens, and darker greens for a soft, bumpy, moss like texture. This is the slowest part of the painting, so let yourself take your time here.
Step 6: Add Final Shadows and Details
Once your moss is filled in, take a bit of green and add soft shadows just beneath each mushroom cap for extra dimension. Then return to your purple and add a small shadow line at the base of each cap, right where it meets the stem. This one small detail makes a noticeably bigger difference in how finished the mushrooms feel.
Step 7: Add Hand Lettering
Clean your brush, pick up a little purple, and write “fairy ink cap” beneath your painting so you always remember which mushroom variety you painted.
Along the Way: A Few Thoughts on Forests and Small Wonders
Fairy ink caps are one of those mushrooms that almost do not look real. They are delicate, fragile, and often appear seemingly overnight after a rain. If you have ever stepped outside in the early morning and noticed mushrooms that were not there the day before, you already know that small flicker of magic.
For centuries, people connected certain mushrooms to fairies, spirits, and enchanted places, especially the circular clusters known as fairy rings. Old stories tell of fairies dancing there at night, and of travelers who stepped inside and found themselves carried into another realm, or found that time simply moved differently once they did. It is easy to see why those old stories still linger.
Ink caps themselves do something remarkable as they mature. Many begin to dissolve into a dark, inky liquid through a natural process called deliquescence, essentially self digesting in order to release their spores. Some species were even historically used to make actual ink, which feels fitting somehow… a tiny forest mushroom quietly becoming the ink behind someone’s letters and stories.
Moss, too, is easy to overlook. It does not draw attention the way flowers do, it simply and slowly transforms stone, wood, and forest floor into something soft and alive. Nothing about a forest feels rushed. Even decay becomes part of renewal, as dead trees feed fungi, fungi feed the soil, and the soil feeds new life. Nothing is wasted.
Perhaps that is part of why forests appear so often in myth and story. They are rarely just a backdrop, they are places of transformation, where characters get lost and somehow find wisdom along the way. In Tolkien’s stories, the forests often feel ancient and aware, Fangorn Forest especially carries that sense that the trees remember things people have long forgotten.
We may not be looking for forests filled with giant spiders, but we do seem to long for places that feel older than noise, places where time slows down enough to think clearly again. Maybe that is part of why quiet, cozy nature art resonates with so many people right now. Life moves fast, full of notifications and schedules and constant urgency, and then you sit down to paint tiny mushrooms and moss for a while, and something in you settles.
Watercolor has a way of teaching patience whether you ask for it or not. You can plan carefully, and the water will still do what it wants. Some of the most beautiful effects only happen once you loosen your grip a little, which feels like its own small lesson. Beauty and control are not always the same thing. The forest is not perfect, mushrooms decay, trees fall, moss grows over broken things, and somehow together it becomes beautiful anyway.
Even the underground world beneath these small mushrooms is astonishing. Most of a fungus actually lives hidden below the surface, in vast networks called mycelium that connect trees and plants together, helping transport nutrients and allowing them to communicate in quiet chemical ways. There is far more happening beneath a forest floor than we can ever see from above.
Tiny mushrooms may seem like an insignificant subject to paint, but they are a good reminder that wonder often hides in small things rather than only in grand cathedrals or distant mountaintops. Sometimes wonder is simply a cluster of fragile mushrooms glowing in the morning light, tucked into moss after the rain, waiting for someone to slow down enough to notice them.
Tips for Practicing This Watercolor Technique
- Add blue slowly when mixing both your purple and your green, since it is a strong pigment that can quickly take over
- Let your mushrooms dry fully before painting the surrounding moss, this makes it much easier to paint around them cleanly
- Layer your greens gradually rather than all at once, building light, mid, and dark tones for a natural, textured feel
- Let this one take its time. Moss is slow to paint on purpose, so let it be a slow, grounding kind of practice rather than something to rush through
Ready to Paint?
This is not a fancy or complicated painting, but it is a meaningful one. Ordinary things, tiny mushrooms, soft moss, a quiet forest floor, are rarely as ordinary as they first appear. If you slow down enough to notice them, and enough to paint them, the world has a way of feeling enchanted again. You do not need years of experience to create something lovely… you just need a little courage, a little patience, and a willingness to begin.

Raeanna
Raeanna loves her home AT FORESTS EDGE. Cultivating life with a big family in America. She is a Watercolor Artist, Writer, Gardener & a Certified Herbalist.