Turning Compost into Garden Gold: 4 Composting Techniques
Composting is a natural process that turns organic waste materials into nutrient-rich compost, enhancing soil fertility and improving plant growth. In this guide, we will explore different forms of composting, how to get started, the optimal amounts of resources needed, seasoning the compost, as well as compost tea, and its various uses.
I independently review every product I recommend. When you make a purchase through a link, I may earn a small commission at no additional cost to you. Learn more
4 Different Forms of Composting:
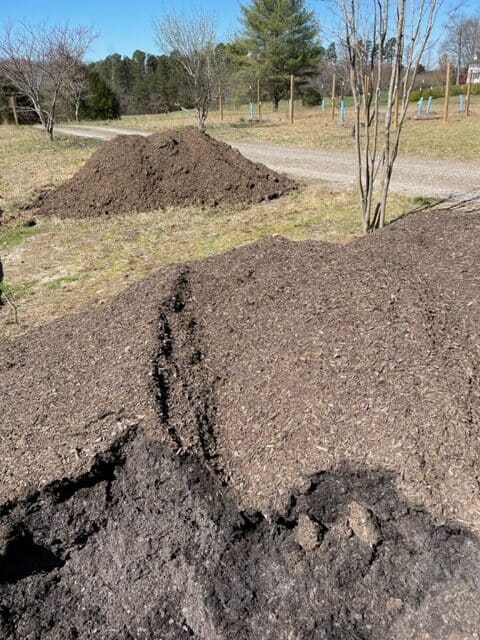
- Backyard Composting: This is the most common form of composting, where organic waste is collected and decomposed in a designated area in your backyard. It can be done in a compost bin, a compost tumbler, or simply a heap. However, I chose the heap method and it worked out just fine.
- Vermicomposting: In this method, worms are utilized to break down organic waste into compost. It is an excellent option for those with limited outdoor space or who want a faster composting process.
- Bokashi Composting: This method involves fermenting organic waste using a unique mixture that contains beneficial microorganisms. It is an anaerobic process suitable for small-scale indoor composting.
- Hemp Deep Litter: This method uses Hemp as chicken coop litter which is known to break down easily and let the chicken droppings mix with the hemp while self-composting.
Getting Started with Simple Backyard Composting:
- Choose a Bin: If you opt for backyard composting, select a compost bin suitable for your needs. I usually keep a collection bin on my counter, this one is pretty Kitchen Compost Bin “paid link”. Consider factors such as available space, convenience, and aesthetics. Compost tumblers are great for turning and accelerating the composting process outside in the back yard like the VIVOSUN Outdoor Tumbling Composter “paid link”
- Greens and Browns: Composing requires a delicate balance between “greens” (nitrogen-rich materials) and “browns” ( carbon-rich materials). Aim for a ratio of 3 parts browns to 1 part greens. Greens include kitchen scraps, grass clippings, and green leaves. While, browns include dry leaves, dried grass, straw, and shredded paper or cardboard.
- Layering and Moisture: Begin by adding a layer of browns as the base, followed by a layer of greens. Continue layering until you have a sufficient amount of materials. Imagine making a lasagna, each layer is essential to the whole experience. Ensure the pile remains moist (similar to a damp sponge), but not soaking wet. Moisture can mean the difference between a perfect microbiome and a sewage spill.
- Turning: Regularly turn your compost pile every 1-2 weeks to aerate it, which aids decomposition and prevents odor. Depending on the season, temperatures can change the rate of decomposition. A pile in the frigid frost will most likely take longer than the same pile in a heat wave.
Vermicomposting:
- Worm Selection: It’s recommended to use red wiggler worms ( Eisenia fetida) as they are efficient composters. But the worm type is up to you. You can purchase them from garden centers or from specialized vermicomposting suppliers.
- Bin Setup: Fill a worm bin with bedding material such as shredded newspaper, coconut coir, or peat moss. Moisten the bedding until it has the same dampness as a wrung-out sponge. Worm Factory Basic 3 Tray Worm Composter “paid link” is a great kit to get started quickly and it’s made by a small business.
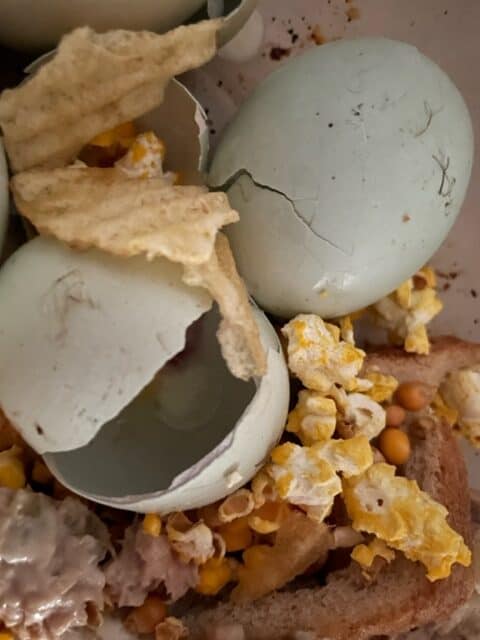
- Feeding the Worms: Add Kitchen scraps like fruit and vegetable peels, coffee grounds, and crushed eggshells to the vermicompost bin. Avoid adding meat, dairy, oily foods, or anything non-organic.
- Harvesting Compost: After several months, the worms will transform the organic waste into compost. To separate the worms from the compost, use the “light method” where a bright light is directed towards the compost causing the worms to burrow deep into the bin, allowing you to scrape off the top layer of compost to use. Otherwise, transfer the contents to one side of the bin and add fresh bedding to the other side. The worms will migrate to the fresh side allowing you to collect the finished compost.
Bokashi Composting
- Choose a bin. You will need an airtight bucket. The bucket (often called a “bokashi bucket” or “bokashi bin”) provides the right anaerobic environment while draining easily. The bucket needs to be sealed completely as the addition of oxygen will terminate the process completely. The All Seasons Indoor Composter Starter Kit “paid link” includes everything you need to get started excluding your kitchen scraps.
- Add scraps to the bin. Add kitchen scraps to your bucket like fruit, vegetables, coffee grounds, egg shells, meat, or cheese. Other organic materials will also work such as grass clippings, or dead leaves.
- Add bokashi bran and squish. Every time you add kitchen waste to the bucket, sprinkle it with a layer of bokashi bran and press down firmly. When the material is compacted, it helps push the air out of the matter and create the best anaerobic environment. After adding the bran and compressing it down, replace the lid. Be sure to store the bucket or bin away from direct sunlight.
- Continue adding food scraps until the bin is full. Every time you add food scraps, continue layering with more bokashi bran and press the pile down.
- Drain liquid. The fermentation process will produce an excess fluid that can inhibit the beneficial bacteria. Every other day, use the spigot to drain excess liquid. This liquid can be diluted as fertilizer for ornamental plants.
Using Bokashi Compost
- After two weeks, bury in an uncultivated area of your garden. First, check to see if the compost is completely fermented. It will feel soft and smell slightly sour. In this state, it is still too acidic for plant roots; it needs a little extra time to go through the true composting process. Bury the fermented food waste in a bare spot of your garden to allow it to decompose, or add it to your composting bins or worm bin.
- Add to your garden soil. Within two weeks of beginning to compost, your fermented bokashi compost should be ready to feed plants. If you buried it in your garden, plant over the top of it. If you added it to your compost pile, incorporate it into your garden bed.e
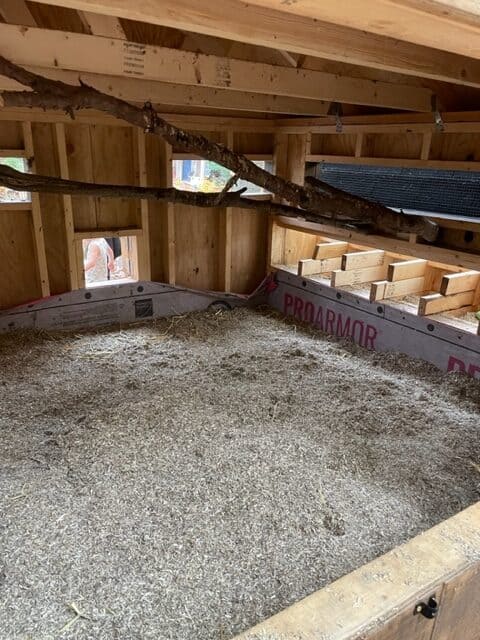
Hemp Deep Litter Method
- In this composting method, spread a layer of hemp shavings or hemp fiber in the chicken coop. Hemp is absorbent, odor-controlling, and rich in carbon. Old Dominion Hemp Bedding “paid link” is the brand we use in our chicken coop. Any brand will work but this one is the brand I chose when doing my research and thus far, I have been happy with the results.
- As the chickens excrete waste, the hemp bedding is busy at work absorbing the moisture.
- Over time, the hemp bedding will naturally decompose along with the manure, creating compost-rich material.
- Seasoning: To ensure pathogens break down, allow the hemp bedding and manure mixture to season for at least six months before using it as compost in the garden.
Compost Tea Recipe and Uses:
- Do not attempt to drink compost tea! It is not that kind of tea! Compost tea is a liquid fertilizer you can easily make by steeping compost in water. It provides a concentrated dose of nutrients and beneficial microorganisms for your plants, not you!
- Recipe: Fill a container ( like a 5-gallon bucket) with water and add a shovelful of finished compost. Allow it to steep for 24-48 hours, occasionally stirring.
- Uses: Use the compost tea as a foliar spray to nourish plants, as a liquid fertilizer for watering, or as a soil drench to improve microbial activity and nutrient availability.
Materials Great For Composting: Green & Brown
| GREENS | BROWNS |
| Kitchen & Garden Scraps | Dry Leaves |
| Crushed Eggshells | Dried Plant Stalks or Twigs |
| Coffee Grounds | Wood Chips or Shavings |
| Tea Bags (remove staples) | Plain Shredded Cardboard |
| Grass Clippings and Yard Trim | Shredded Paper/Paper Products |
Do Not Compost These Items
| Meat, Fish, and Bones | Fats, Oils, Grease |
| Dairy Products such as Cheese | Treated or Painted Wood |
| Pet Excrement including Cat Litter | Weeds that could take over |
| Glossy or Waxed Papers | Diseased or Pest infested plant matter |
| An extensive amount of cooked food | Anything treated with herbicides |
| Dryer Lint | Stickers found on produce |
Why should you compost when you could just purchase fertilizer from the store?
Composting is a valuable practice that reduces waste, replenishes the soil, and promotes sustainable gardening. Whether you choose traditional composting, vermicomposting, the bokashi method, or if you wish to explore the Hemp litter method, follow these guidelines to create nutrient-rich compost for a flourishing garden. Enjoy the process and reap the rewards of your efforts. Relax, drink some herbal tea, and save the compost tea for your garden!
For an in-depth historical record of composting this article from The Compost Foundation is an interesting read.
Also, check out this lovely guide if you would like to learn more about GARDENING IN ZONE 7b.
Thank you for meeting me AT FORESTS EDGE. Where I am learning to grow food for my family and sharing my insights with you. I would love for you to join me on this journey, and subscribe to my newsletter where I share encouragement throughout the year as we GROW HOPE!
Until we meet again,
Raeanna
Raeanna
Raeanna loves her home AT FORESTS EDGE. Cultivating life with a big family in America. She is a Watercolor Artist, Writer, Gardener & a Certified Herbalist.